How to Install and Set Up the Figma MCP Server
How to Install and Set Up the Figma MCP Server
The model context protocol (MCP) is transforming AI workflows by enabling AI agents and LLMS to connect to external tools and data sources. It makes AI agents smarter, allowing them to perform tasks beyond mere text generation. One of the examples of how we can use MCP for more intelligent workflows is by using Figma MCP servers.
Before MCP, we typically had to provide a screenshot or image of the design to an LLM or AI chatbot to convert the design into front-end code. However, this approach usually produced inaccurate and limited results as the context wasn’t rich enough for the chatbot to fully understand the design's intent or structure.
Thankfully, MCP has changed this. Today, we have Figma MCP servers that we can integrate with MCP clients (AI-powered apps) like Claude or Cursor, enabling them to convert Figma designs into more accurate front-end code.
Understanding Figma MCP Server
Figma is developing an official MCP server that is currently in public beta. Once mature, this server will provide the most standard-compliant solution for developers working with Figma’s API and MCP-based tools.
Fortunately, we also have multiple community-run Figma MCP servers used by many developers and designers worldwide:
Currently, one of the most popular Figma MCP servers is the Framelink Figma MCP Server with over 8k stars on GitHub. This server gives Cursor (an AI-powered code editor) access to Figma files and metadata like frames, layers, and components, enabling it to inspect the structure of files and gather context about design.
We can also use this server to implement design changes through natural language commands (in Cursor’s “agent” mode) without manually navigating Figma's interface.
In this article, we’ll provide a step-by-step guide for installing and setting up this MCP server in Cursor.
Explore more MCP servers for designers here.
Implementing Framelink Figma MCP Server
Here, I’ll be using the Ubuntu WSL (Windows Subsystem for Linux) as Cursor v0.50.4 and above supports remote workspace stdio, such as WSL and SSH. This means these versions of Cursor can handle MCP servers running inside WSL directly without using cmd /c.
When using the Figma MCP server with Cursor through Windows Terminal or PowerShell, Cursor sometimes doesn’t detect tools. So, it’s best to use Ubuntu WSL.
Let’s get started (make sure you have node installed on your system).
Creating a Project Folder
Open Ubuntu WSL and run the following commands:
cd \~

mkdir \-p mcp-server

cd mcp-server
Getting Your Figma API Token
To use this server, we need a Figma API token. First, sign up for Figma. Once you have your Figma account, here’s how you can get your token:
Click on your account icon on the left sidebar and select settings:
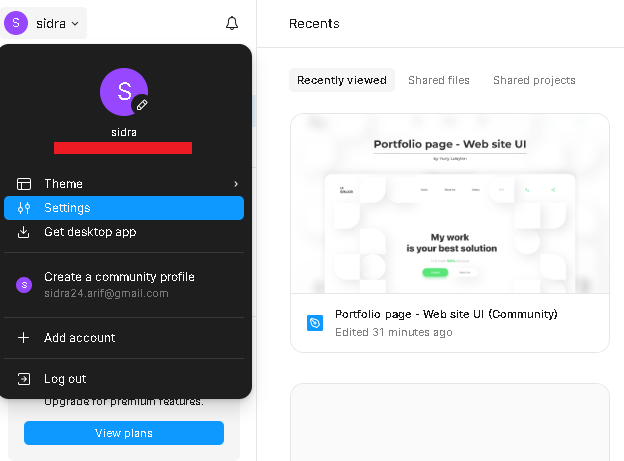
Then, go to the settings tab and select “Generate new token”:
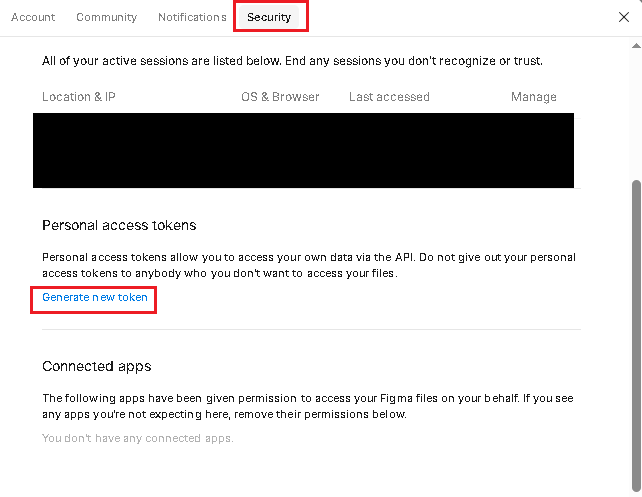
Select a name for your token, provide ‘read-only’ access for all fields, and click “Generate token”:
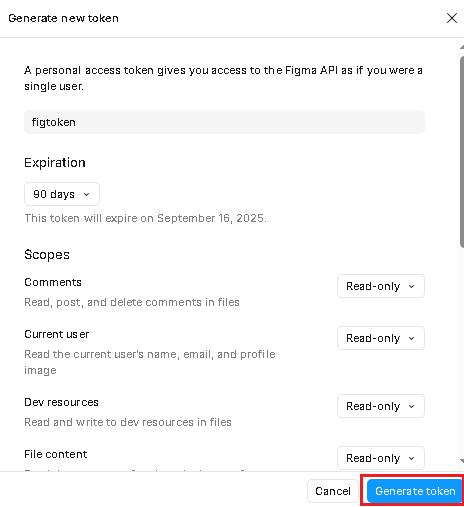
Figma will then generate a personal token for you:

As you can see in the above image, Figma only shows this token once. Copy it and save it somewhere to use later for the MCP server implementation.
Installing the MCP Server
First, install the server globally on your system:
npm install -g figma-developer-mcp
Then run the following command:
figma-developer-mcp --stdio --figma-api-key=YOUR_FIGMA_TOKEN
This command will start the Figma MCP server and authenticate it with your Figma account using your API key.
Note: Replace the token with your actual Figma token that you generated in the previous step.
Connecting the Server to Cursor
Now that our server is running, we can connect it to Cursor. Since we’re using Ubuntu WSL, we need to use Cursor's WSL remote integration. Here’s how to do it:
In the bottom left corner in Cursor, you’ll see a small sign for opening a remote window:
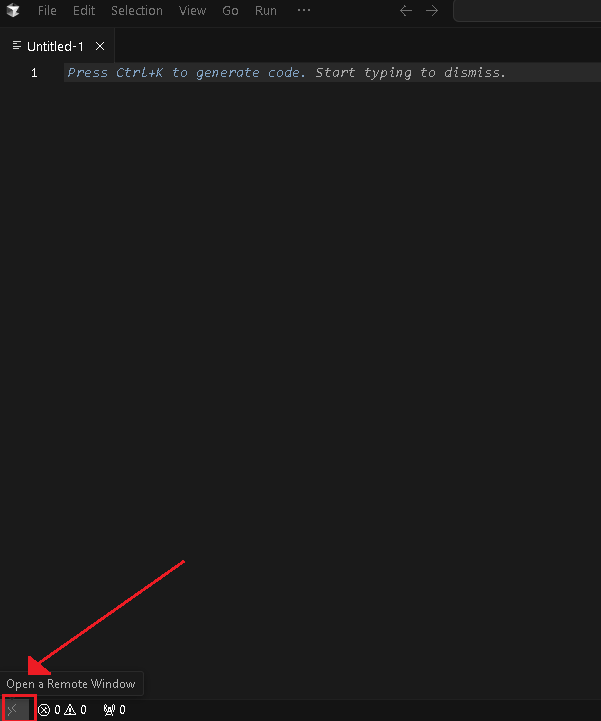
When you click it, it’ll show you the option to connect to WSL:

Now, select your project folder:

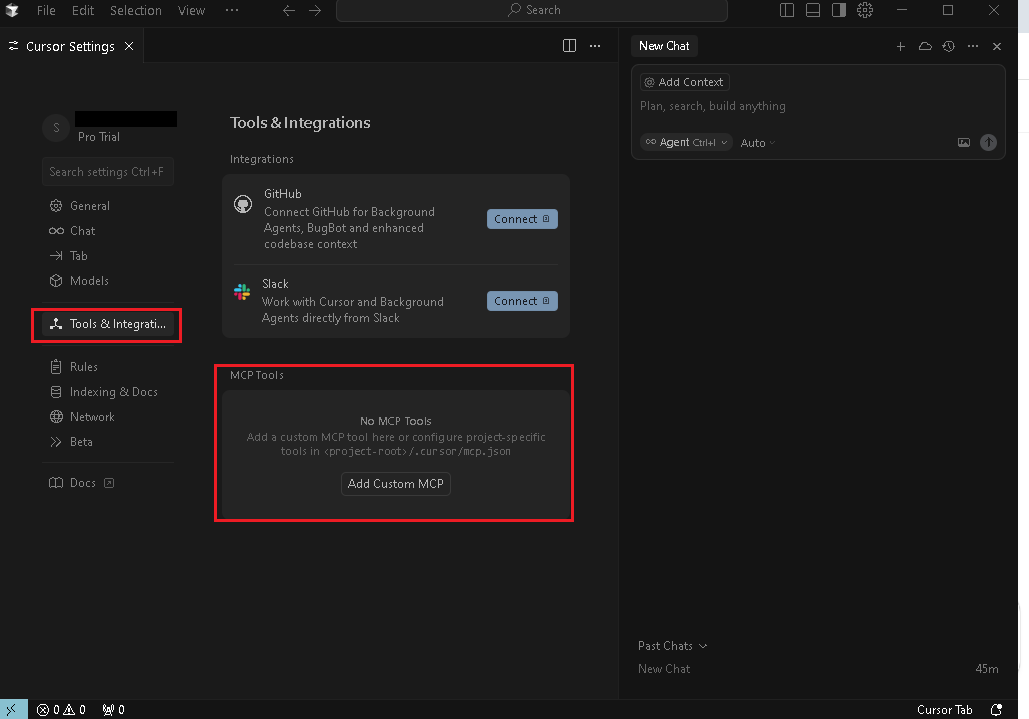
Next, we’ll add our MCP server configuration in Cursor. To do so, go to Cursor settings and click “Tools and Integrations”. Then, select ‘Add a custom MCP server’:
Now, add the following code to the Cursor mcp.json file:
{
  "mcpServers": {
    "Figma Context MCP": {
      "command": "npx",
      "args": [
        "-y",
        "figma-developer-mcp",
        "--stdio",
        "--figma-api-key=YOUR_FIGMA_KEY"
      ]
    }
  }
}
Note: Replace ‘YOUR_FIGMA_KEY’ with your actual Figma API token.
We don’t need to add cmd /c or any wrappers because Cursor v0.50.4 and above handles WSL stdio automatically.
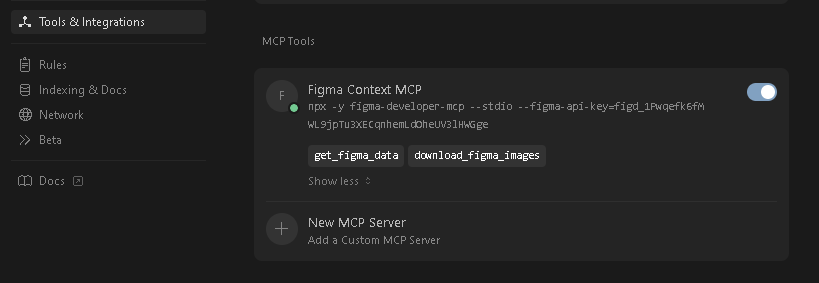
Once you add the above code to the mcp.json file, save it and go to Cursor settings again. You’ll now see your MCP server with tools:
If, after adding the code, Cursor keeps showing loading tools, simply disable the server and enable it again.
Now, go to your Figma account and choose a design. For demo purposes, we have taken a free template:
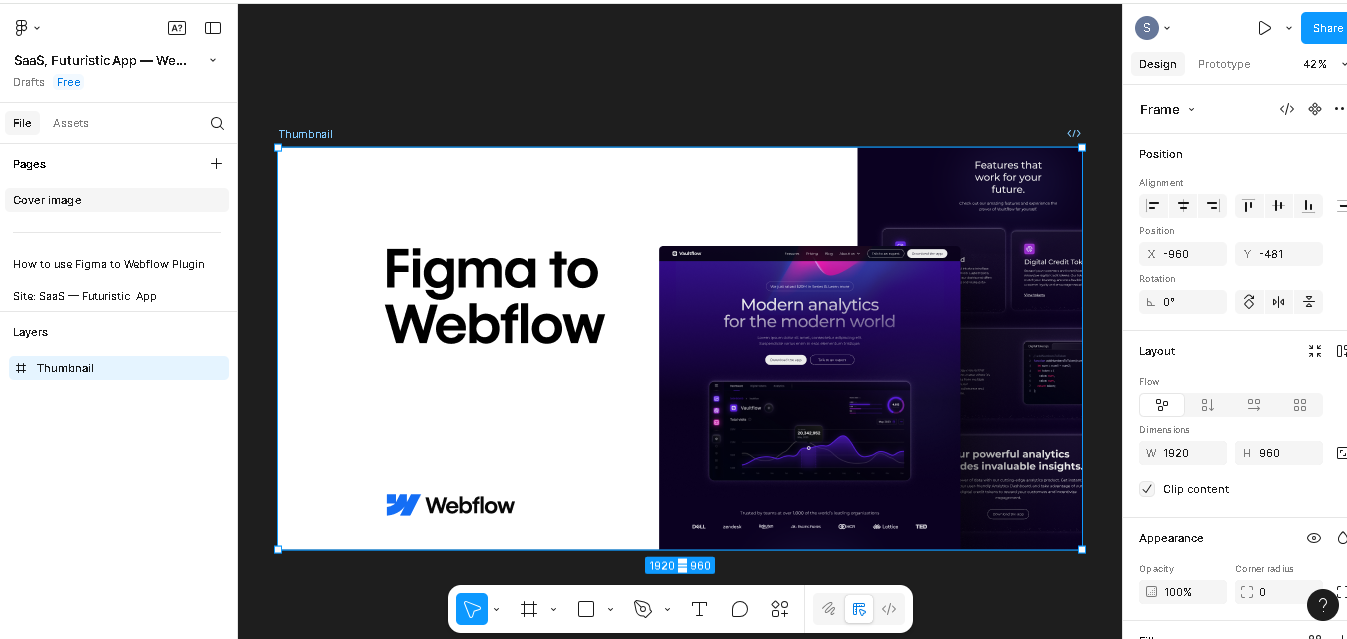
Click on the main frame, and select ‘copy link to selection’:

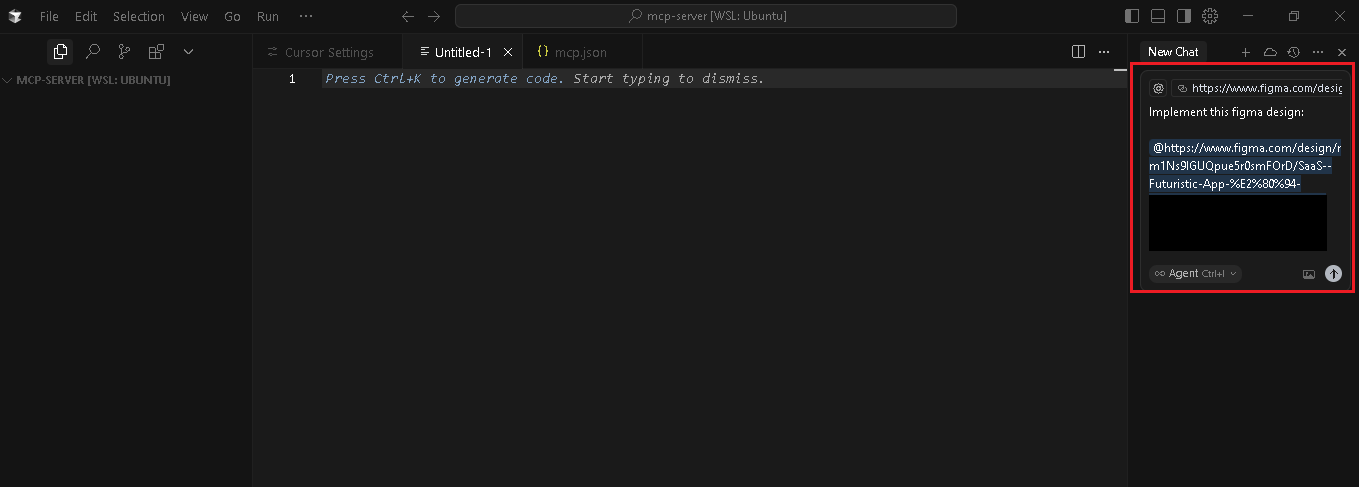
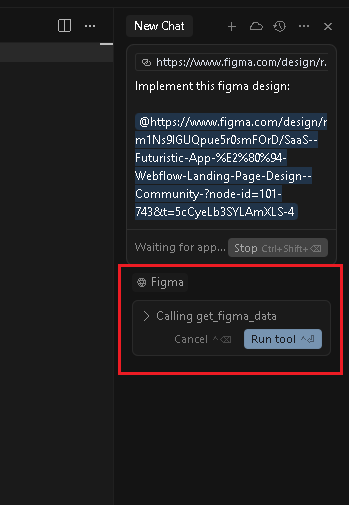
Now, go to Cursor and paste this link in the ‘Agent’ interface and provide a prompt like ‘Implement this Figma design’:
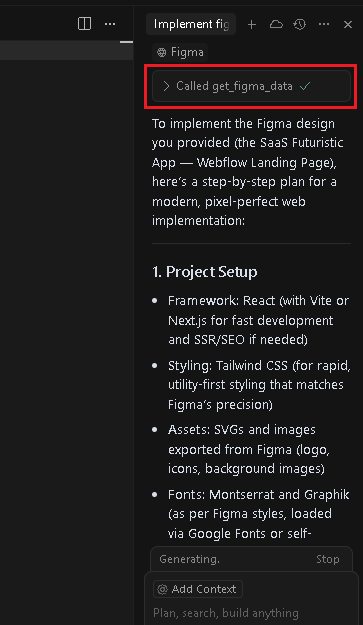
Curson will then call the get_figma_data tool from the Figma MCP server and ask for your permission to run the tool:
Cursor will then provide you with steps to implement the design:
You can then ask Cursor to provide the complete project, and it will generate all the required files/code for you automatically:
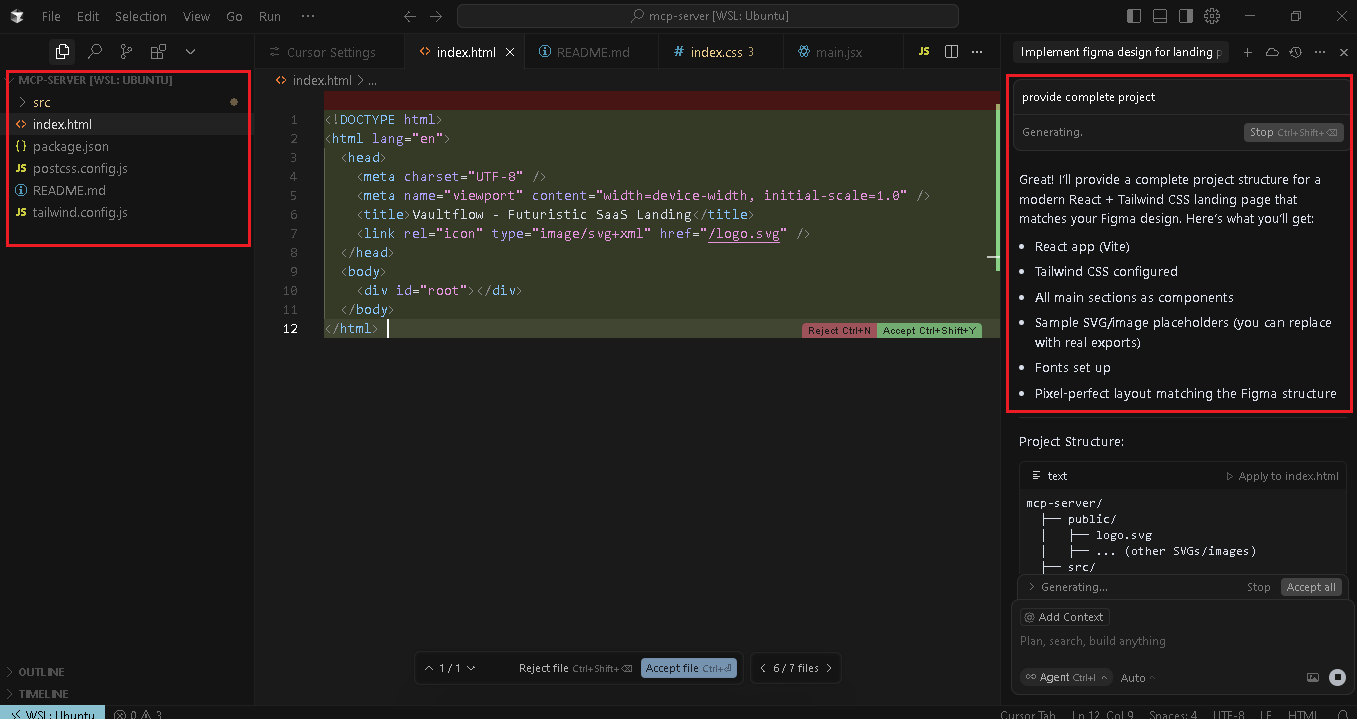
You can then replace the placeholder images with your actual images and simply build your project. Notice how easy the Figma MCP server has made it to implement a Figma design.
Conclusion
The Framelink Figma MCP server has made it easier to provide detailed design context to AI models (specifically Cursor) and generate accurate code for it. Before MCP, we needed to provide a screenshot of the design to the AI model, which often produced inaccurate results.
In this article, we’ve provided a detailed step-by-step guide for implementing the Framelink Figma MCP server in Cursor.